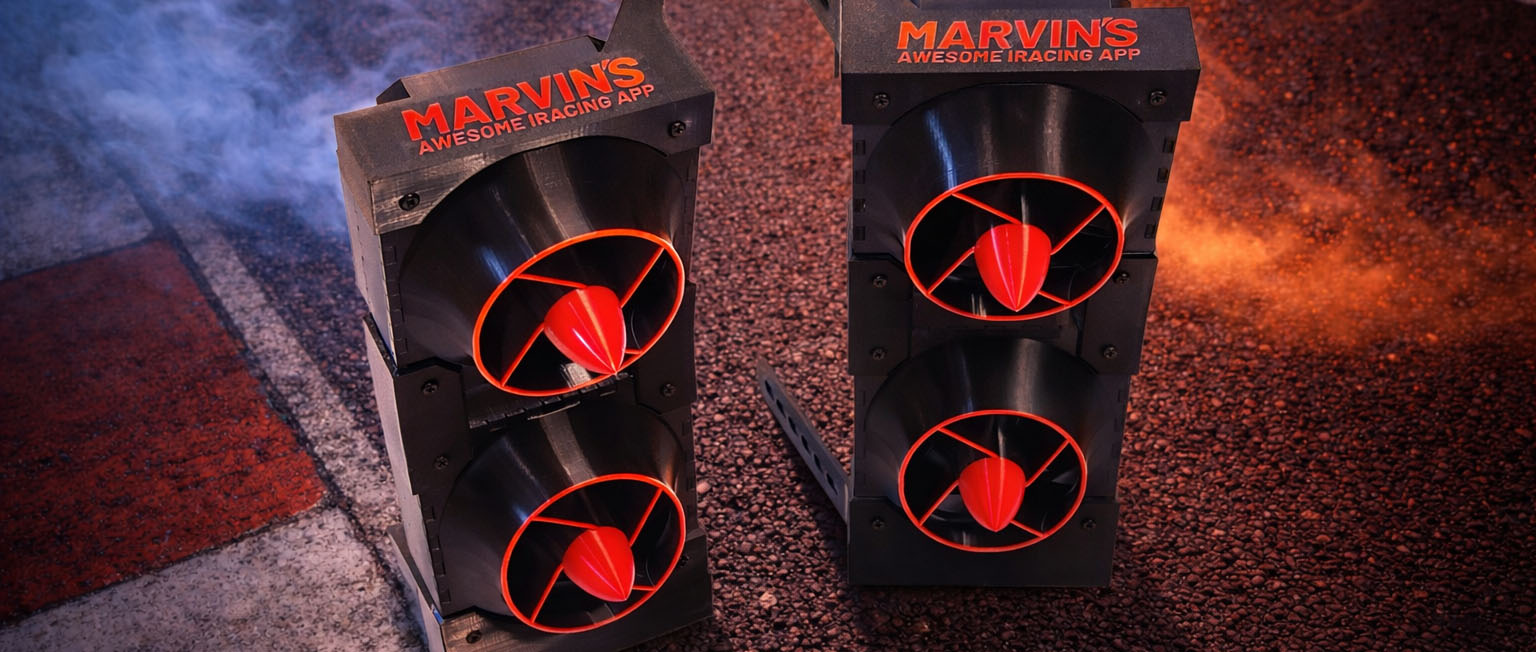
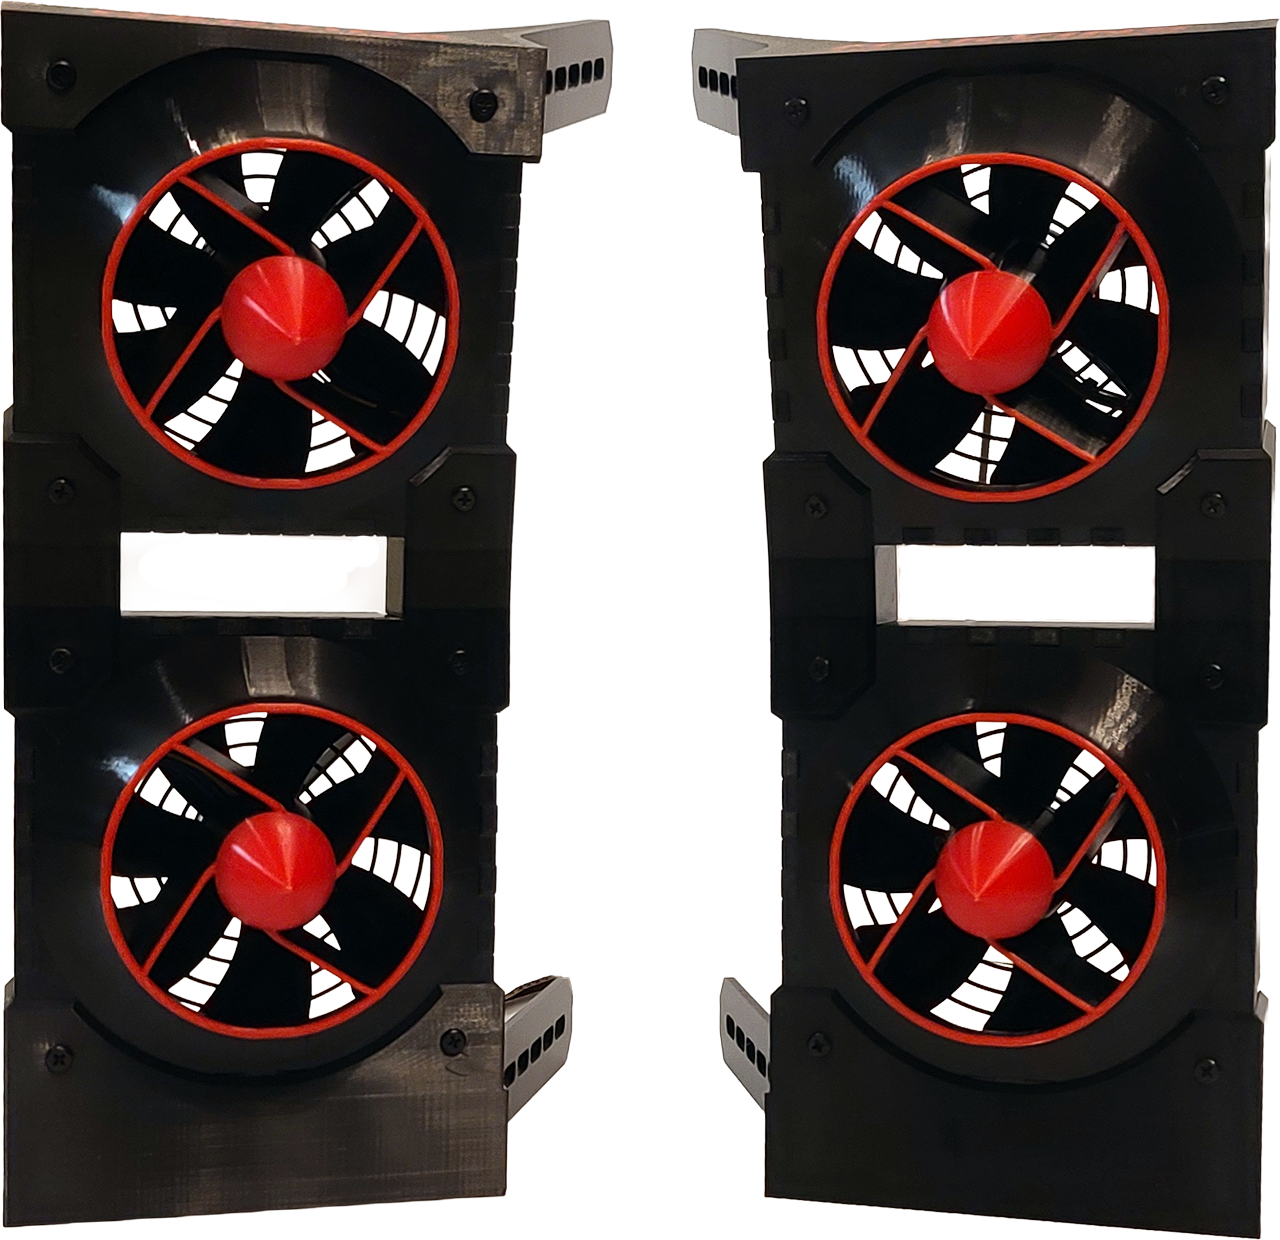
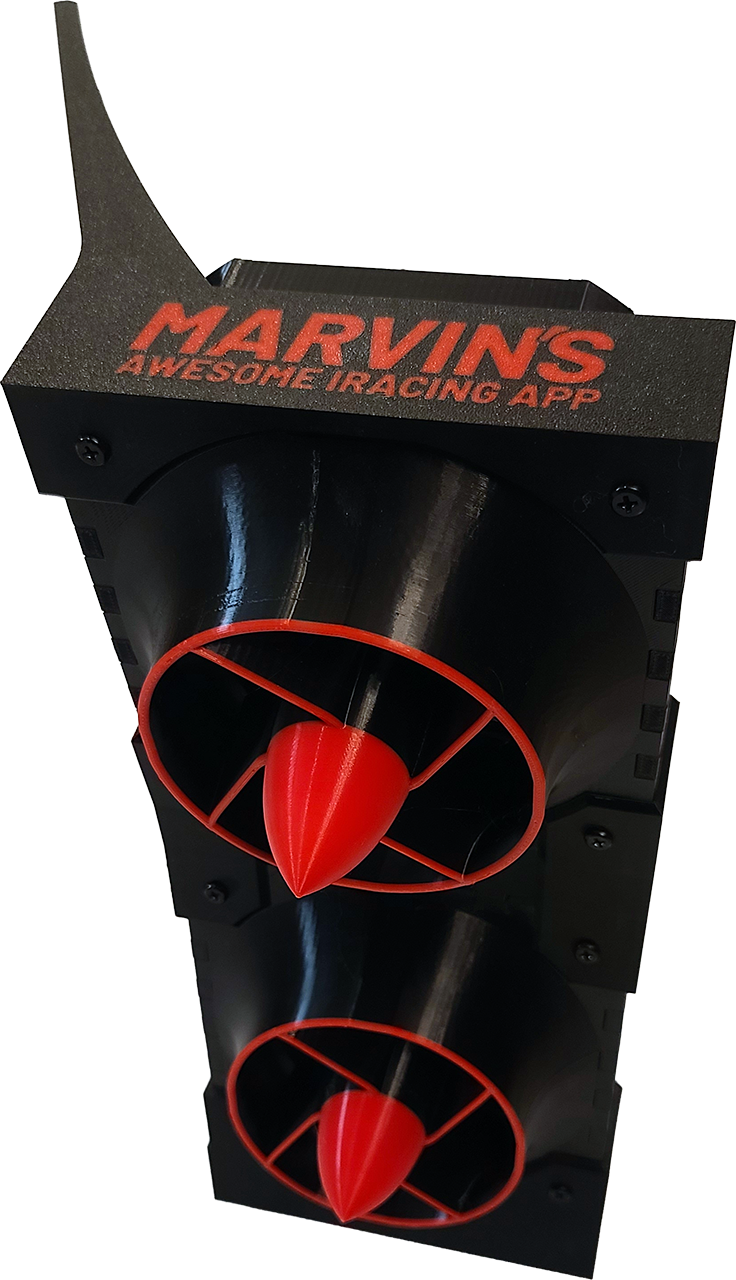
Photos
Overview
These fan kits can be controlled via either Marvin’s Awesome iRacing App (MAIRA) for iRacing only, or via SimHub (any game supported by SimHub). You can purchase these kits from my Etsy store:
https://www.etsy.com/listing/4468608166/maira-typhoon-wind-kit
There are two variations of this kit that you can purchase:
- $99 for Typhoon Duo Kit
Two pods, one 140mm fan in each pod (two fans total) - $115 for Typhoon Quad Kit
Two pods, two 140mm fans in each pod (four fans total)
In addition to the prices for the above kits, you can also expect to spend approximately an additional $115 (Duo) to $180 (Quad) for parts not included in these kits. This means your total spend will be approximately $215 (Duo) and $295 (Quad), not including 3d printing costs, tariffs, or taxes.
I’ve also made these optional kits available:
- $10 for Extruded Aluminum Mounting Kit
- $20 for Duo to Quad Upgrade Kit
The fan that I recommend for use with this kit is –
- Noctua NF-A14 industrialPPC-3000 PWM (140x25mm)
- 158 CFM at 3000 RPM
- Fairly quiet (42 dB at max RPM)
- The fans can come to a full stop (zero RPM)
- Consumes only 7 watts per fan
You can also use any other 140mm fans as long as they are 25mm or less in thickness. The 3D printing files included with this kit matches the design of the Noctua NF-A14 fan exactly (the fins line up).
Compare this kit to the SRS “Hurricane” Power Wind kit package which they sell for $309 to $369, that comes with weaker 120mm fans, and a controller that has a flimsy micro-USB port that easily breaks. I have two of those, and the micro USB port broke on both of them!
What This Kit Comes With
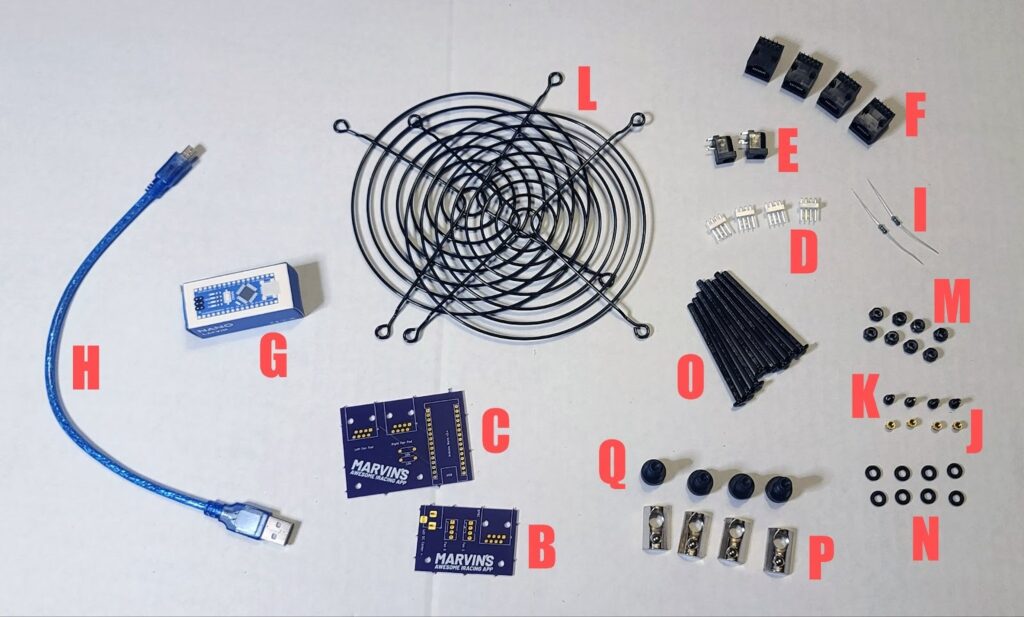
These are the parts that comes in the Typhoon Duo kit:
- 3MF and STL files for 3D printing the fan pods and controller box parts [not pictured]
- Custom designed wind pod PCB board (2) [only one shown in picture]
- Custom designed fan controller PCB board (1)
- Fan headers (4)
- Power jack (2)
- RJ45 terminals (4)
- Nano V3.0 pre-loaded with MAIRA Typhoon Wind firmware (1)
- USB cable (1)
- 4.7 kOhm Resistors (2)
- Heat-set inserts (4)
- Black M3 x 6mm bolts (4)
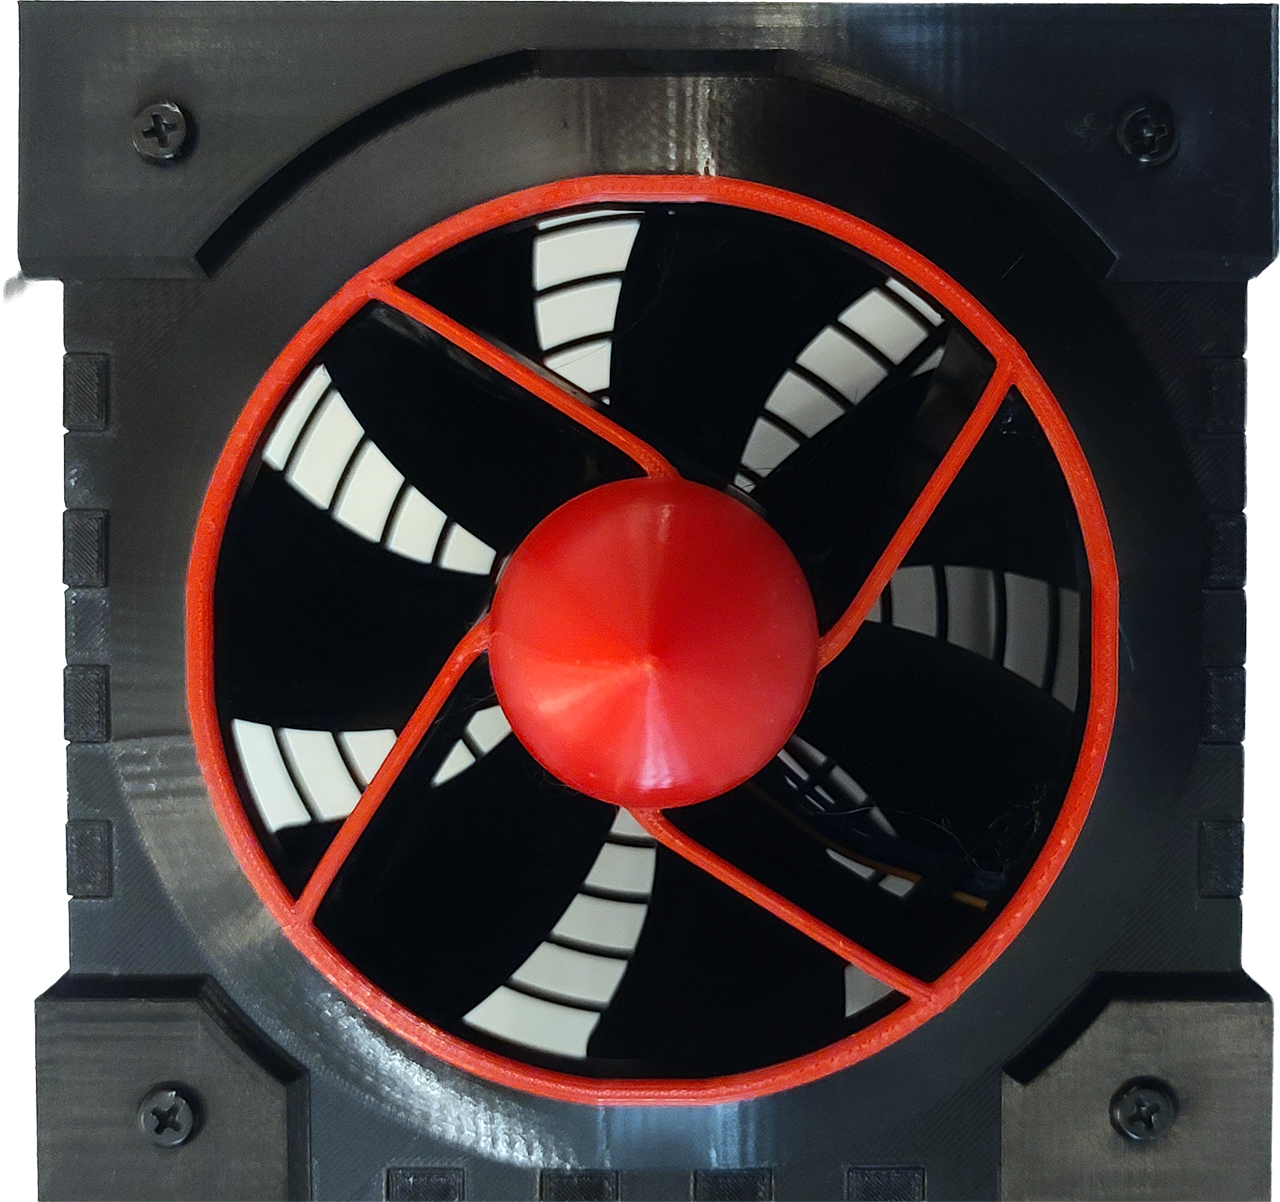
- Black 140mm fan grills (2)
- Black M4-0.7 locking nuts (8)
- [Ignore this – no longer needed]
- Black M4-0.7 x 50mm fan pod bolts (8)
The Typhoon Quad kit comes with the same parts as above, and also:
- 2 extra Black 140mm fan grills (4 total)
- 8 extra Black M4-0.7 locking nuts (16 total)
- [Ignore this – no longer needed]
- 8 extra Black M4-0.7 x 50mm fan pod bolts (16 total)
The optional extruded aluminum rig mounting kit comes with:
- M8 T-nuts with ball spring (6)
- M8-1.25 x 16mm socket head cap screws (6)
- M8 Washers (6) [not pictured]
Parts Made / Purchased Separately
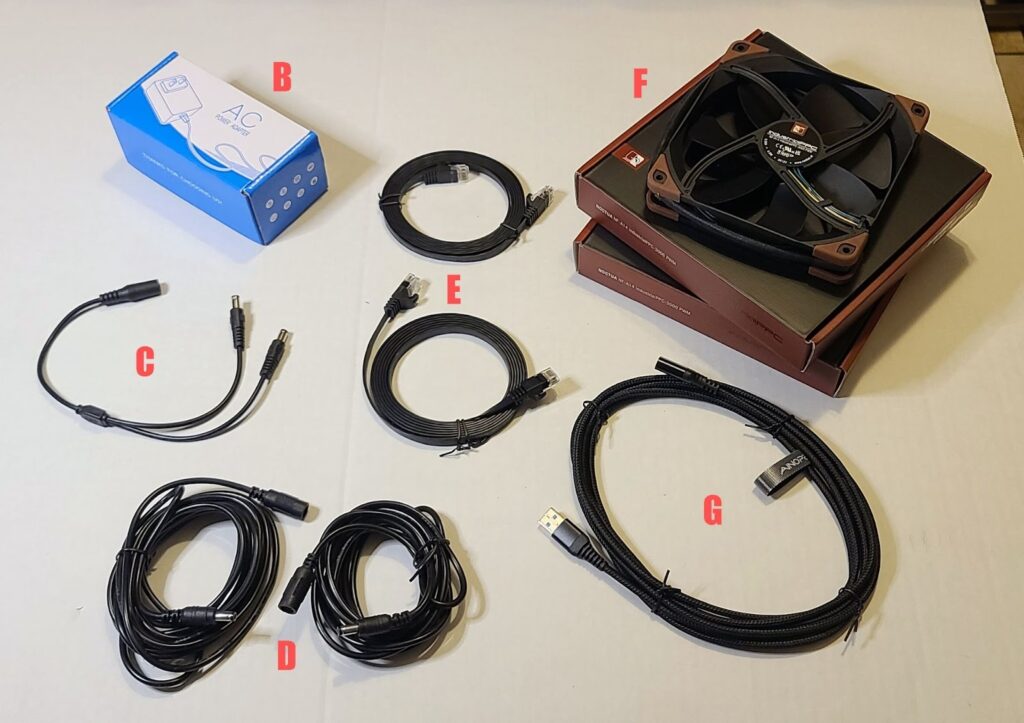
These are the parts that do not come in any of the kits:
- 3D printed parts for the fan pods or controller box [not pictured]
- Power supply
- Power splitter cable
- Power extension cables
- Network cables
- Fans [Recommended Noctua fans pictured]
- USB cable extension
- Switched surge protector [optional, not pictured]
Here are links to find the remaining parts on Amazon
Prices mentioned are as of 12/27/2025 and may have changed since then.
- 36W power supply [can support 4 fans]
$9.99
https://www.amazon.com/dp/B07VQGHSWY - Fans [you need 2 or 4]
$65.90 for Duo, $131.80 for Quad
https://www.amazon.com/dp/B00KFCRF1A - Power splitter cable [you can buy two power supply instead]
$8.99
https://www.amazon.com/dp/B07J28SX6Y - Power extension cables [you can buy two power supply instead]
$8.99
https://www.amazon.com/dp/B09Q7V9GGQ - USB extension cable
$8.99 for 10ft
https://www.amazon.com/dp/B0FDQF5N7K - For network cables [you can use any common Ethernet cables]
$10.30 for 7ft
https://www.amazon.com/dp/B0CHMMJSFH - Any switched surge protector to turn fans off when not in use [optional]
Instead of buying the power splitter cable and power extensions cables, you can choose to buy two power supplies and connect them directly to the fan pods. This will save you some money, but will take up two sockets on your surge protector instead of one.
Instructions
These parts come in kit form only – you will need to 3D print some parts, solder some parts onto the PCB boards, and then assemble them together. I have attempted to make this process as painless as possible, with videos to help guide you. Here is an overview of the steps you will need to take to put this kit together:
- 3D print the fan pods and controller box parts using the supplied 3MF files
- Test fit everything before continuing with the assembly!
- https://youtu.be/jywSYEjZfe8
- Controller box PCB assembly
- Solder the Nano onto the controller PCB
- Solder the 4.7kOhm resistors onto the controller PCB
- Solder the RJ45 ports onto the controller PCB
- TODO: Video
- Assemble the controller box
- Mount the controller box PCB into the box
- Snap together the two halves of the controller box (tool-less!)
- https://youtu.be/0Zr-wnaFtPE
- Fan pod PCB assembly
- Solder the fan headers onto the fan pod PCBs
- Solder the power jacks onto the fan pod PCBs
- Solder the RJ45 ports onto the fan pod PCBs
- Check for shorts with a multimeter for safety (important!)
- TODO: Video
- Fan pod boot preparation
- Heat-set the inserts onto the fan pod boot
- Mount the fan pod PCBs onto the fan pod boot
- https://youtu.be/M3PyQfUQsRg
- Assemble fan pods
- Place the fans into the fan pod centers
- Place the fan grills onto the fan pod centers
- Assemble the fan pod back and fronts
- Assemble the fan pod hat and boot
- Insert the 50 bolts and secure with locking nuts
- https://youtu.be/UeO_oZm9qfw
- Final setup
- Mount the fan pods onto your sim rig
- Mount the controller box onto your sim rig
- Connect the fan pods to the controller box via network cables
- Connect the power supply and cables to the fan pods
- Connect the controller box to the PC via USB cable
- Plug the power supply into the wall or switched surge protector
- TODO: Video
Tips and Safety Notices
Here are some tips about 3D printing the parts you need:
- You can use any color and type of filament
- You can use the color-change-at-layer feature in your slicer as well!
- Printing the Typhoon Duo parts will consume a little less than 1KG of filament
- Printing the Typhoon Quad parts will consume roughly 1.5 KG of filament
- The 3MF files are tuned for Bambu Studio features
Safety notices:
- Please do not neglect to install the fan grills that come with the kit – I am not responsible for your kid’s fingers getting cut off.
- After soldering the electrical components onto the PCB boards, please use a multimeter to check for shorts. Fire can result from a shorted power connection. While the recommended power adapter does come with short circuit cut-offs, please check for shorts anyway.
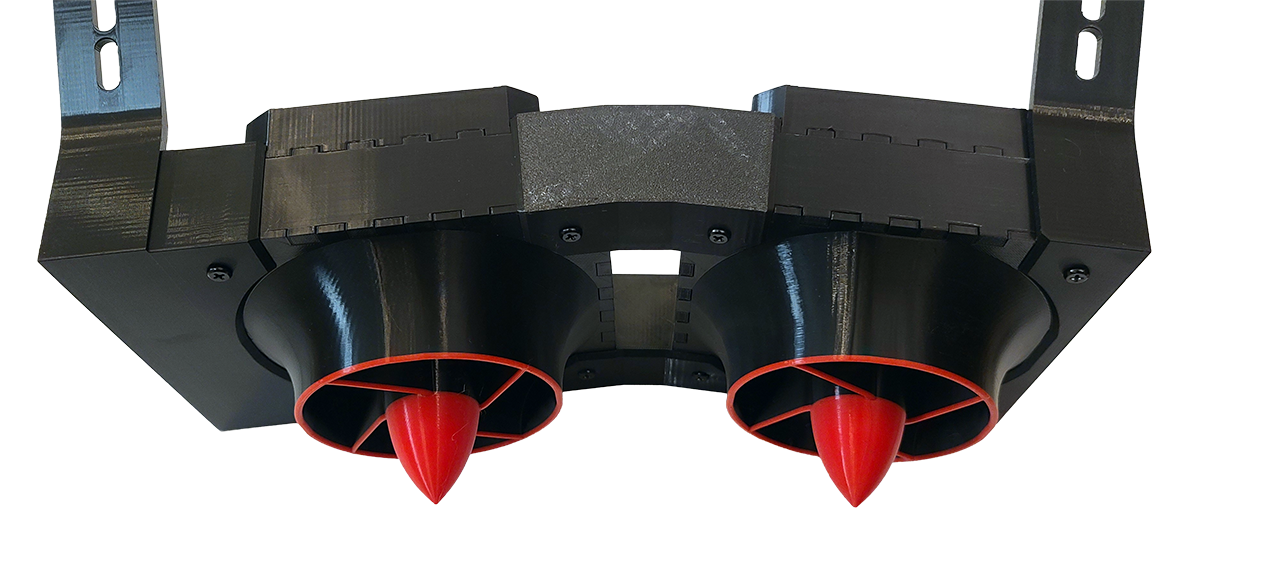
Cutaway View

My Sim Rig
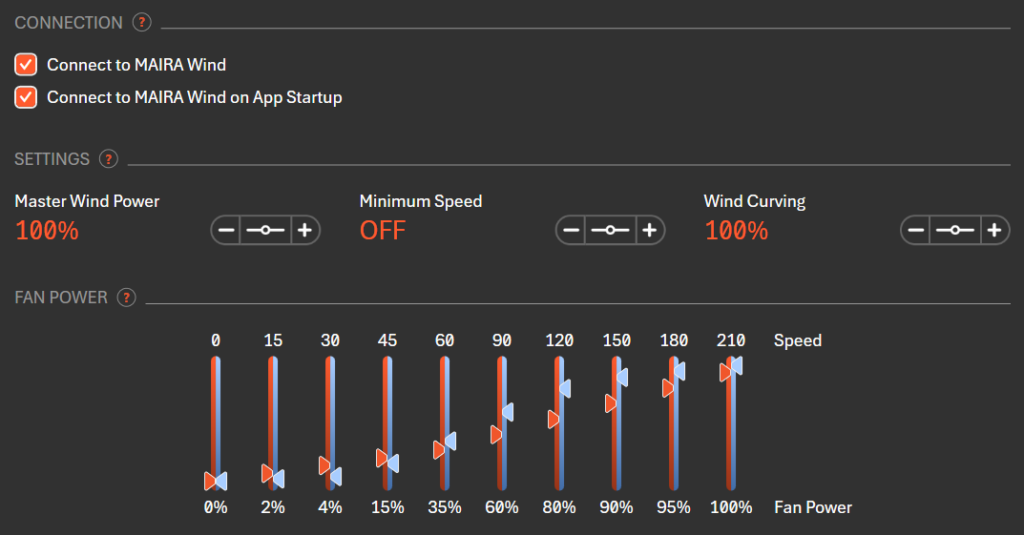
Software Settings (MAIRA)